If you’re anything like my clients, then you’ve been on more video calls in the last couple of weeks than in the last two years combined 🙂
In fact, according to Zoom’s CEO, Zoom’s daily active users jumped from 10 million to over 200 million in only a few months.
As a coach, I’m on Zoom most of my day but for many, possibly also you, video conferencing was more of a rarity than the norm up until a few weeks ago.
And you might still be trying to figure it all out and get truly comfortable with it.
While Zoom isn’t the only video conferencing tool, it certainly is the dominant player in the market these days.
And because of that, I want to share my favorite Zoom tips with you that will make you look better on your video calls and will save you time.
If you’re not interested in either of those, then close this message now because it’s not for you. BUT if you care about how you look on video or you love saving time then in your day then this curated summary of tips is exactly for you!
To make things easy, I’m going to share what works for a Pro Account which currently costs $14.99 a month. While there is a free plan, the plan only allows you to host meetings up to 40 minutes which for many of us isn’t enough.
Investing the $15 is way worth it and I assume that your company is likely paying for it on your behalf as part of a business or enterprise account.
#1 Know when to use the personal meeting room versus a specific meeting room
You might know this already but for the benefit of the doubt…
Your “Personal Meeting Room” has one link that never changes. This means that anyone with the link could join your personal meeting room at any point in time while you’re in it unless you change the settings to block people out.
This is great if you don’t want to deal with different meeting links. However, as mentioned above… anyone could drop in (and yes, that can be awkward… I speak from experience).
Your “Meetings”, on the other hand, are scheduled at a specific time and Zoom will create a specific link or meeting ID per meeting. You can certainly set recurring meetings and for those, the link will always be the same.
I, personally, use the personal meeting rooms 90% of the time. For recurring meetings, such as the calls for my group coaching programs, I set up specific meetings with unique IDs.
#2 Make your Personal Meeting Room ID more memorable
Since you’ll likely be using your personal meeting room why not personalize that unique URL?
This is a trick I only realized a few months ago and I’ve finally implemented it. For example, I could use a link-creation plugin called PrettyLinks for my WordPress site to create a www.ramonashaw.com/zoomcall (just as an example) which forwards all visitors straight to my Personal Meeting Room. This URL is a lot easier for me and for my clients to remember.
Now, you probably don’t have access to your company’s WordPress site (or whatever CMS you use) but you could use bitly.com or https://rebrandly.com/ to create a custom link such as bit.ly/RamonasZoom or rb.gy/RamonasZoom
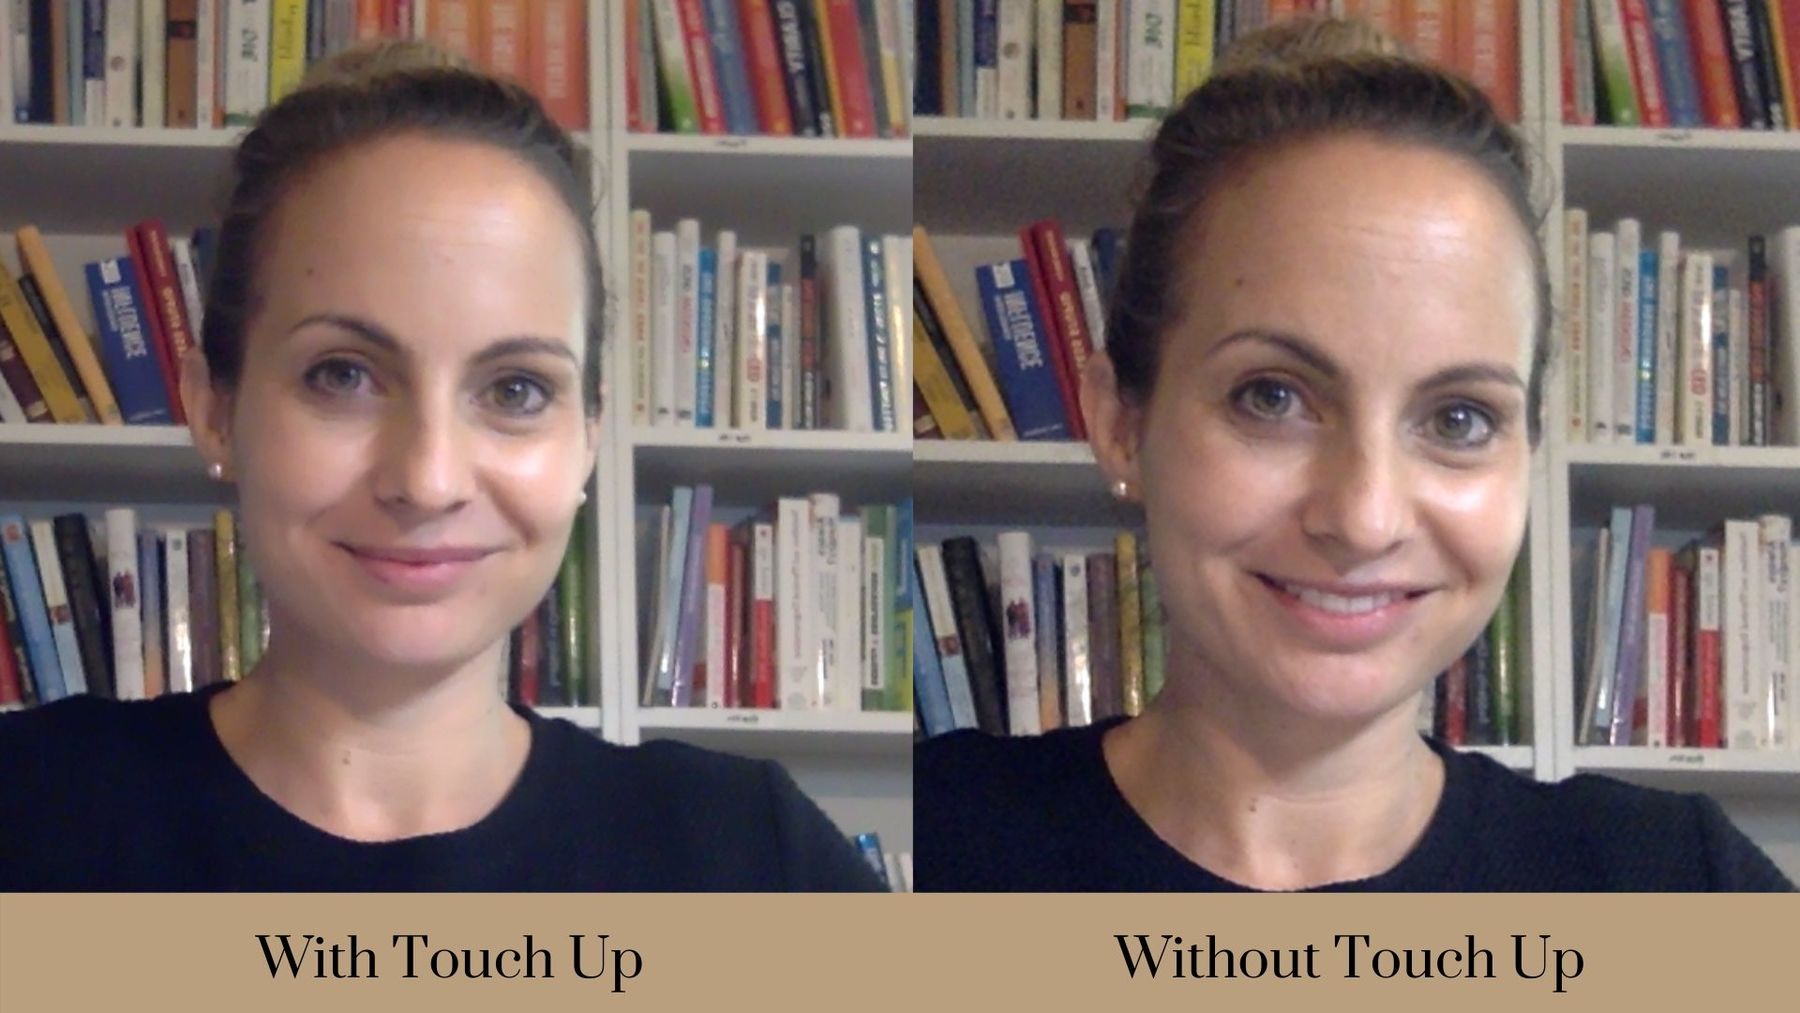
#3 Experiment with Zoom’s touch up tool
Zoom introduced a nice feature that “touches up” your face on your video camera. It’s nothing as dramatic as Snapchat’s fake makeup 🙂 but it softens your skin and hair tone. I don’t use it on every call but there are definitely days when I’m very grateful for that “touch up”.
Here is quick “before and after” picture to show you the difference.
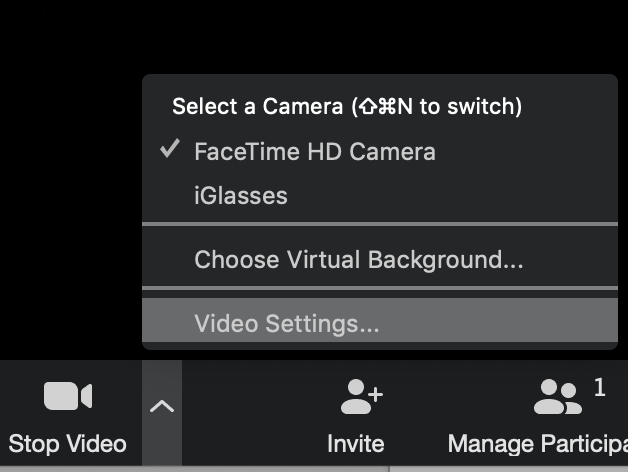
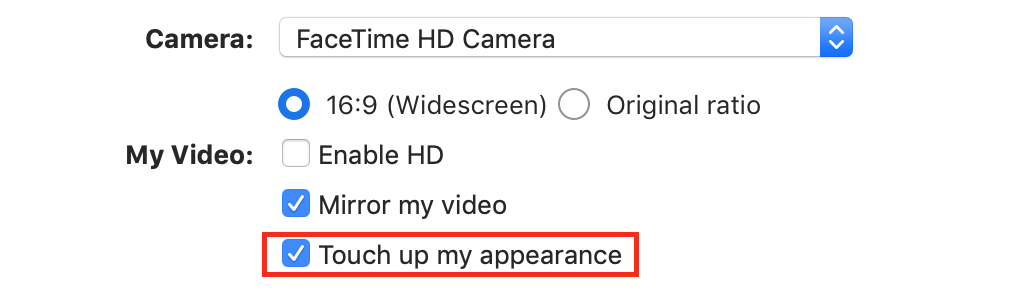
The way to turn this feature on is to…
- click the arrow next to the “Stop Video” label at the bottom of the screen,
- then click on “Video Settings”, and lastly,
- tick the box for “Touch up my appearance”.
👉 Dealing with Imposter Syndrome? Check out this episode of The Manager Track podcast to finally understand what’s causing it.
#4 Use Zoom Virtual Backgrounds (but do so only if you need to)
I think it’s great for people to see where you work and what your room looks like. It’s real, it’s raw, and it’s bonding.
For that reason, I don’t suggest using a virtual background by default unless you have something really messy in the background or people (i.e. your kids :-)) are frequently walking by behind your desk which could be distracting for others.
However, there could definitely be a situation where you have to talk to an executive or a client and you want to appear as professional as possible.
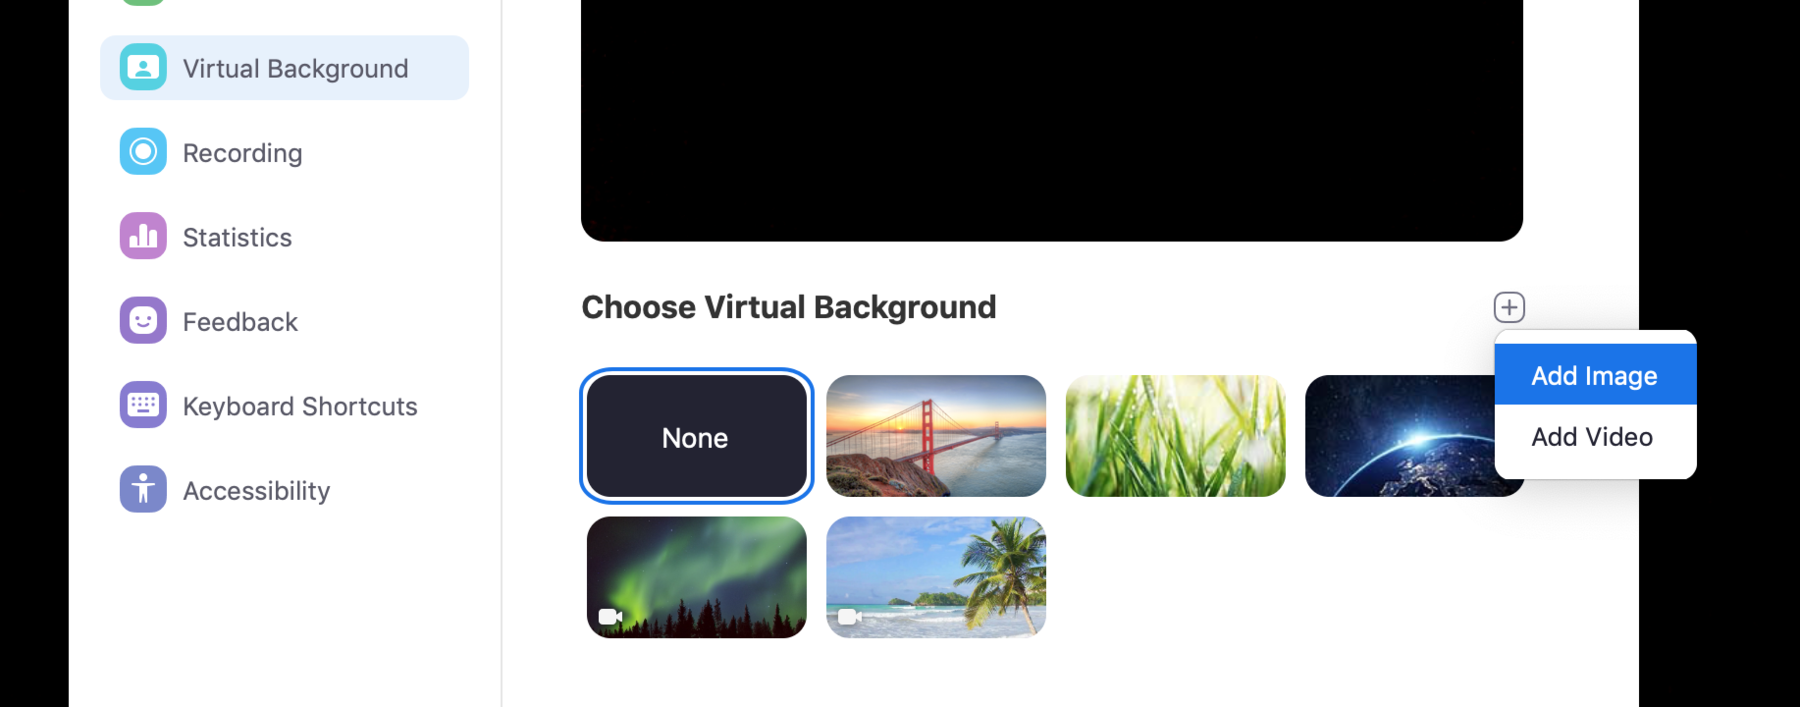
In those instances, I suggest you add a virtual background by doing the following:
- Click the arrow next to the “Stop Video” label at the bottom of the screen,
- Click on “Choose Virtual Background”,
- Select the “+” sign and choose “Add image”
- Upload a custom background image of an actual nice and neat home office. If you want to look professional, then don’t use the galaxy or beach image :-). A great option is to check out West Elm’s specifically designed video conference backgrounds here.

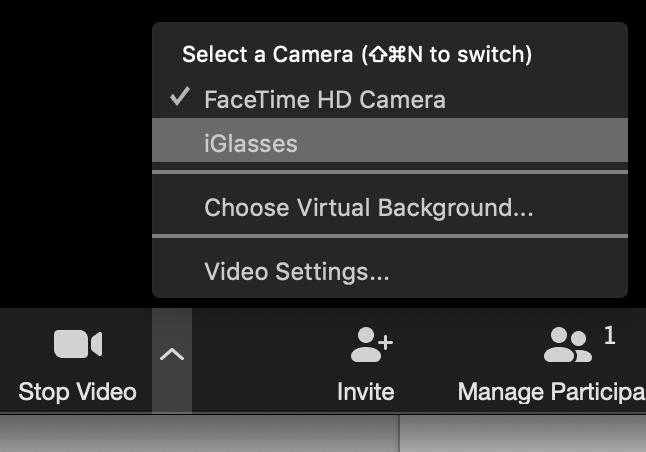
#5 Add a virtual camera to your Zoom meeting for more features
When you use virtual or external cameras with Zoom, you can adjust the exposure and white balance, zoom in or out, and even add filters.
I’m currently using iGlasses which you can get as a free download but I bet there are a ton of others out there. The biggest benefit I get from it is that it allows me to zoom in and cut out the window next to the bookshelf behind me without having to bring my laptop super close. Occasionally, I use it to adjust the brightness if the lighting in my office isn’t good.
If that sounds like a valuable tool to have then download the virtual camera or connect an external one. Once done, use your new camera within Zoom by doing the following.
- Go to the arrow next to “Video Settings” on the bottom of the screen.
- Select your new virtual (or external) camera.
- Change the setting as desired and you’re ready to go.
#6 Let others start the meeting without you
I bet you’ve been in the situation when it’s time to join a meeting but instead of the Zoom room opening up you’re getting a message that says “Please wait for the host to start this meeting”. This is particularly annoying when you realize that everyone on your team is waiting and ready to get started but the person who set up the call (possibly your boss) is caught up in something else and running late.
It’s a waste of time and energy for everyone involved. This can easily be prevented by making a change to Zoom’s settings.
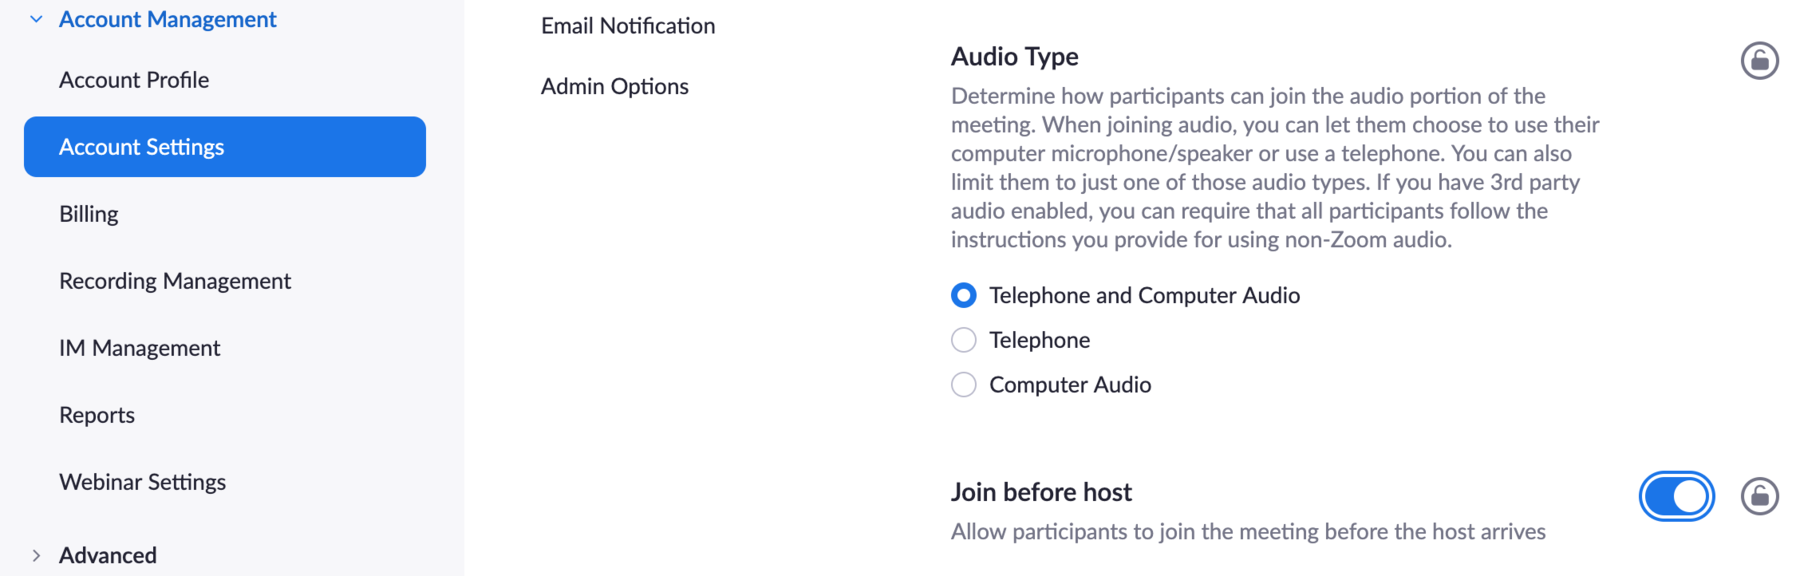
- Sign in to the Zoom web portal.
- Click “Account Management”, then click “Settings”.
- Navigate to the “Join Before Host” option on the “Meeting” tab and enable the setting.
Side note: If the option is grayed out, then that means that it has been locked at either the Group or Account level, and you will need to contact your Zoom administrator.
👉 Is a lack of confidence holding you back? I wish there was a magic pill to get rid of self-doubt but there isn’t… Instead, the practice of building and protecting your confidence is a bit like building muscles. HERE IS HOW TO DO IT.
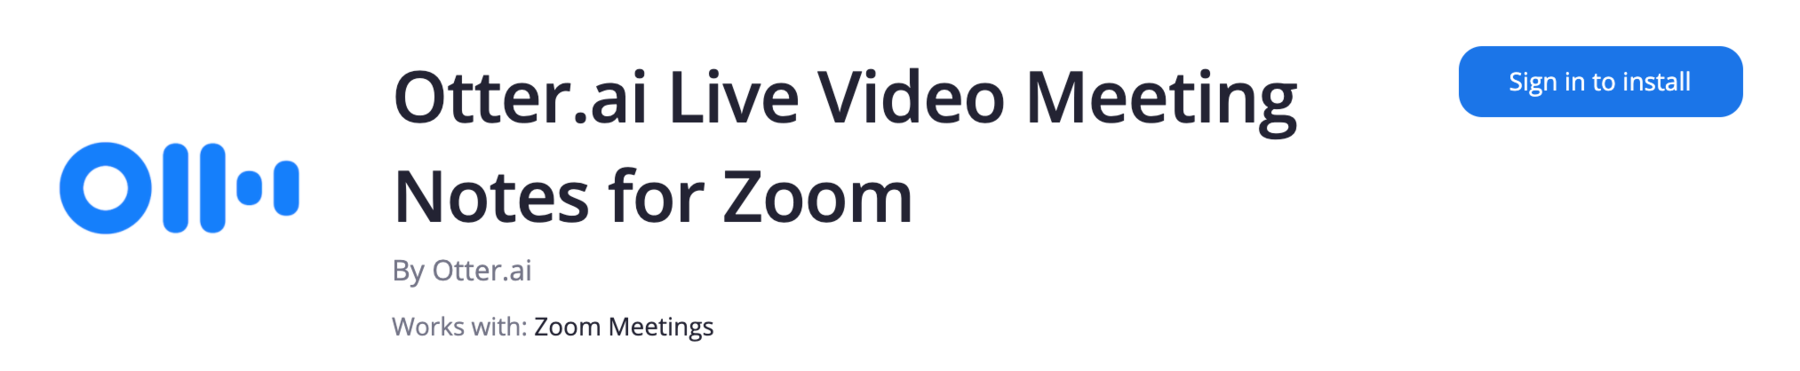
#7 Integrate a transcription app
If you create meeting minutes for some of your calls or if you need to give people who weren’t able to attend the meeting an update on what was discussed, then the Otter.ai app might just be the solution you’ve been waiting for.
Otter will automatically transcribe your meeting recordings and send you the file once it’s ready.
To get it set up, go to
- Go to https://marketplace.zoom.us/.
- Search for the Otter.ai app.
- Complete the installation process and you’re good to go.
To use Otter make sure your settings are properly configured to record your meeting in the cloud. Otherwise, if you don’t record the meeting, Otter won’t work.
And that concluded my final tip on using Zoom like a pro!
Curious, which one was your favorite. Email me back and let me know 🙂
I’ll see you next week and in the meantime, stay healthy, stay calm, stay focused.
Your Leadership Coach,